
一、Harbor简介
Harbor是由VMware公司中国团队为企业用户设计的Registry server开源项目,包括了权限管理(RBAC)、LDAP、审计、管理界面、自我注册、HA 等企业必需的功能,同时针对中国用户的特点,设计镜像复制和中文支持等功能。
作为一个企业级私有Registry服务器,Harbor提供了更好的性能和安全。提升用户使用Registry构建和运行环境传输镜像的效率。Harbor支持安装在多个 Registry节点的镜像资源复制,镜像全部保存在私有Registry中, 确保数据和知识产权在公司内部网络中管控。另外Harbor也提供了高级的安全特性,诸如用户管理,访问控制和活动审计等。
- 基于角色的访问控制:用户与Docker镜像仓库通过"项目"进行组织管理,一个用户可以对多个镜像仓库在同一命名空间(project)里有不同的权限。
- 镜像复制:镜像可以在多个 Registry 实例中复制(同步)。尤其适合于负载均衡,高可用,混合云和多云的场景。
- 图形化用户界面:用户可以通过浏览器来浏览,检索当前Docker镜像仓库,管理项目和命名空间。
- AD/LDAP支持:Harbor可以集成企业内部已有的AD/LDAP,用于鉴权认证管理。
- 审计管理:所有针对镜像仓库的操作都可以被记录追溯,用于审计管理。
- 国际化:已拥有英文、中文、德文、日文和俄文的本地化版本。
- RESTful API:RESTful API提供给管理员对于Harbor更多的操控, 使得与其它管理软件集成变得更容易。
- 部署简单:提供在线和离线两种安装工具,也可以安装到 vSphere 平台(OVA 方式)虚拟设备。
二、Harbor安装
1、安装Docker
[root@localhost ~]# curl -sSL https://get.daocloud.io/docker | sh
# 启动Docker
[root@localhost ~]# systemctl start docker
2、安装docker-compose
[root@localhost ~]# wget https://github.com/docker/compose/releases/download/v2.16.0/docker-compose-linux-x86_64 -O /usr/bin/docker-compose
[root@localhost ~]# chmod +x /usr/bin/docker-compose
3、安装Harbor
1)下载安装包,版本为v2.7.1
[root@localhost ~]# wget https://github.com/goharbor/harbor/releases/download/v2.7.1/harbor-offline-installer-v2.7.1.tgz
2)解压
[root@localhost ~]# tar xf harbor-offline-installer-v2.7.1.tgz
3)安装
[root@localhost ~]# cd harbor
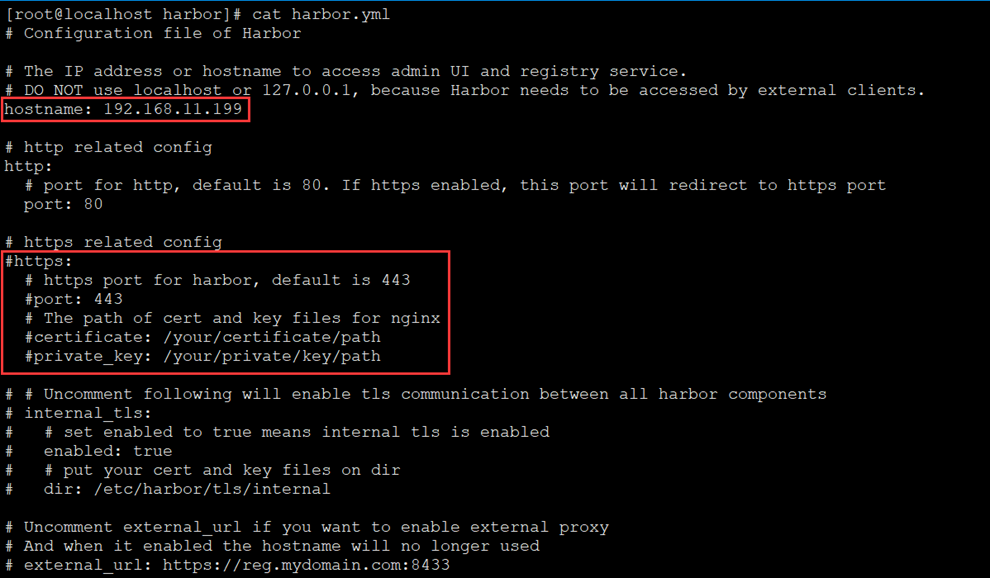
[root@localhost harbor]# cp harbor.yml.tmpl harbor.yml
# 修改hostnmae
[root@localhost harbor]# vim harbor.yml
# 注释https,不然在安装的时候会报错:ERROR:root:Error: The protocol is https but attribute ssl_cert is not set
# 其他配置保持默认
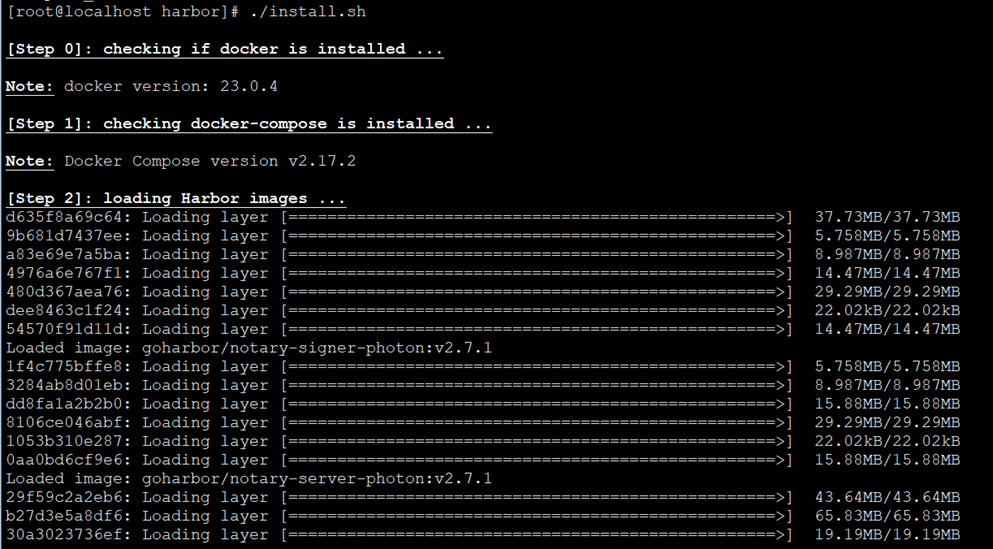
[root@localhost harbor]# ./install.sh
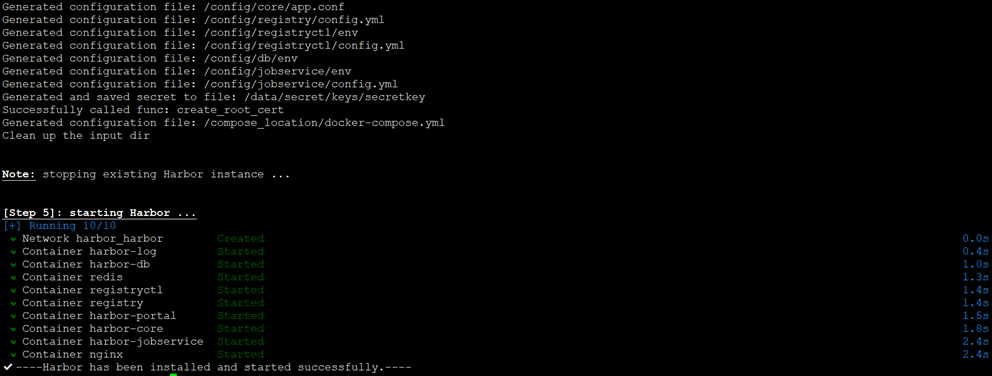
从上图可以看到Harbor已经成功安装并启动了。
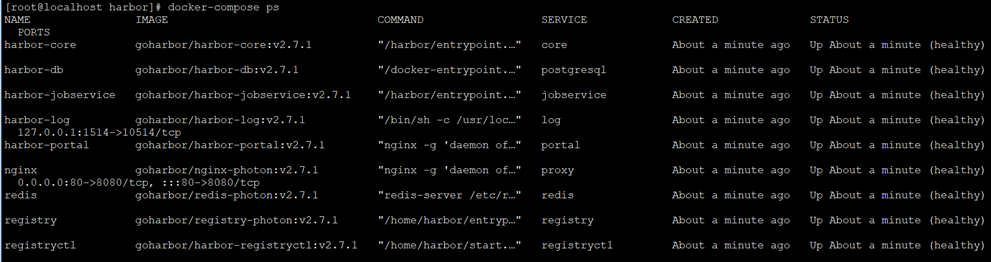
4、查看Harbor的状态
[root@localhost harbor]# docker-compose ps
5、访问Harbor仓库
# 浏览器访问http://192.168.11.199,默认用户名密码为:admin/Harbor12345
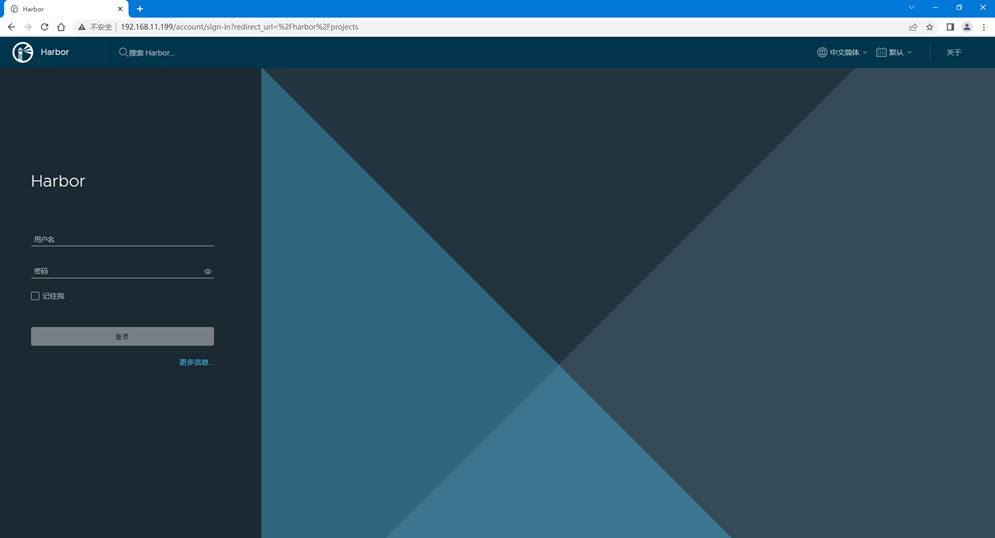
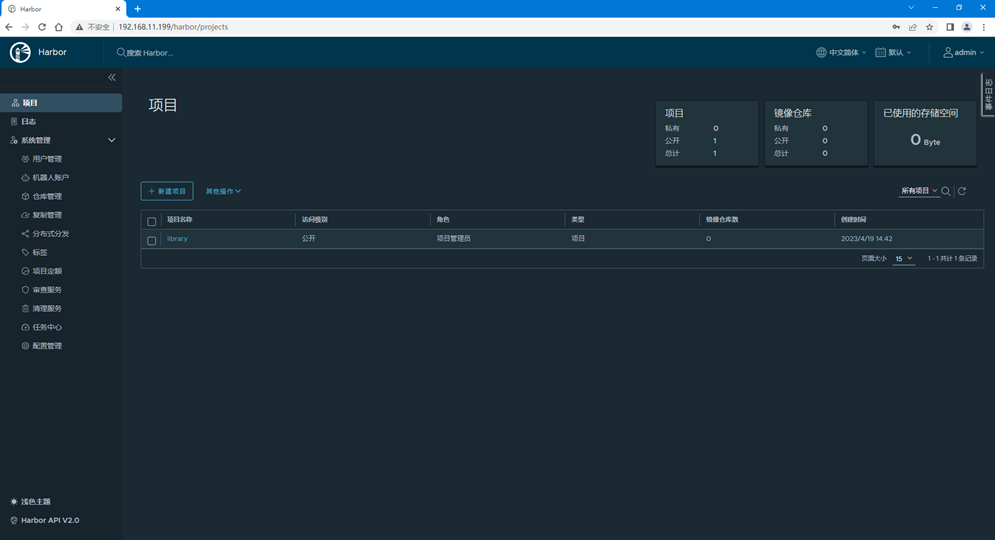
注:登录后的第一件事情永远都是修改默认密码。然后就可以在项目管理中新建和管理项目了。不过默认情况下的项目library是公开的,如果你要使用这个项目,而且域名放在公网上,请取消公开。
4、客户端验证
1)安装Docker
[root@localhost ~]# curl -sSL https://get.daocloud.io/docker | sh
2)配置客户端信任http
# 由于从docker1.3.2版本开始,使用registry时,必须使用TLS保证其安全。我们不用https的话,需要在客户机中增加一个配置文件。
[root@localhost ~]# vim /etc/docker/daemon.json
{
        "registry-mirrors": ["http://192.168.11.199:5000"]
}
# 启动Docker
[root@localhost ~]# systemctl start docker
3)登录Harbor仓库
[root@localhost ~]# echo "Harbor12345" >/etc/docker_passwd
[root@localhost ~]# cat /etc/docker_passwd |docker login -u admin --password-stdin http://192.168.11.199
Error response from daemon: Get "https://192.168.11.199/v2/": dial tcp 192.168.11.199:443: connect: connection refused
4)修改docker.service
# 在ExecStart后面加入--insecure-registry=192.168.11.199
[root@localhost ~]# sed -i "/ExecStart/s/$/ --insecure-registry=192.168.11.199/" /usr/lib/systemd/system/docker.service
5)重新启动Docker
[root@localhost ~]# systemctl daemon-reload
[root@localhost ~]# systemctl restart docker
[root@localhost ~]# cat /etc/docker_passwd |docker login -u admin --password-stdin http://192.168.11.199
WARNING! Your password will be stored unencrypted in /root/.docker/config.json.
Configure a credential helper to remove this warning. See
https://docs.docker.com/engine/reference/commandline/login/#credentials-store
Login Succeeded
6)验证推送镜像
1、pull镜像
[root@localhost ~]# docker pull hello-world
Using default tag: latest
latest: Pulling from library/hello-world
2db29710123e: Pull complete
Digest: sha256:4e83453afed1b4fa1a3500525091dbfca6ce1e66903fd4c01ff015dbcb1ba33e
Status: Downloaded newer image for hello-world:latest
docker.io/library/hello-world:latest
2、打标签
[root@localhost ~]# docker tag hello-world 192.168.11.199/library/hello-world:v1
3、推送到Harbor
[root@localhost ~]# docker push 192.168.11.199/library/hello-world:v1
The push refers to repository [192.168.11.199/library/hello-world]
e07ee1baac5f: Pushed
v1: digest: sha256:f54a58bc1aac5ea1a25d796ae155dc228b3f0e11d046ae276b39c4bf2f13d8c4 size: 525
7)查看Harbor
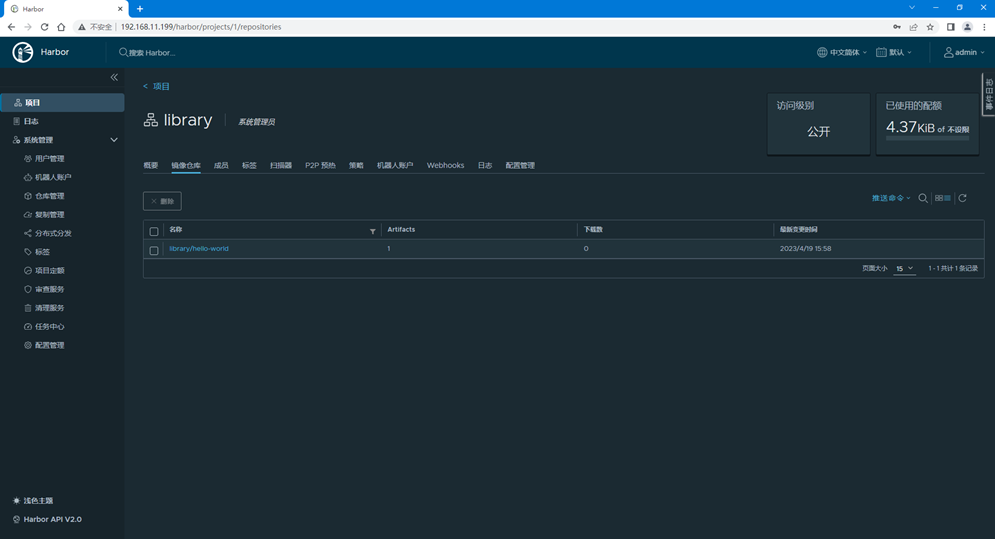
从上图可以看出镜像已经上传成功了。
8)删除本地的镜像,从Harbor上pull
1、查看本地镜像
[root@localhost ~]# docker images
REPOSITORY TAG IMAGE ID CREATED SIZE
192.168.11.199/library/hello-world v1 feb5d9fea6a5 19 months ago 13.3kB
hello-world latest feb5d9fea6a5 19 months ago 13.3kB
2、删除本地镜像
[root@localhost ~]# docker rmi -f bf756fb1ae65
[root@localhost ~]# docker images
REPOSITORY TAG IMAGE ID CREATED SIZE
3、从Harbor上pull镜像
[root@localhost ~]# docker pull 192.168.11.199/library/hello-world:v1
v1: Pulling from library/hello-world
2db29710123e: Pull complete
Digest: sha256:f54a58bc1aac5ea1a25d796ae155dc228b3f0e11d046ae276b39c4bf2f13d8c4
Status: Downloaded newer image for 192.168.11.199/library/hello-world:v1
192.168.11.199/library/hello-world:v1
4、查看镜像
[root@localhost ~]# docker images
REPOSITORY TAG IMAGE ID CREATED SIZE
192.168.11.199/library/hello-world v1 feb5d9fea6a5 19 months ago 13.3kB
若文章图片、下载链接等信息出错,请在评论区留言反馈,博主将第一时间更新!如本文“对您有用”,欢迎随意打赏,谢谢!


评论