一、Ceph概述
Ceph是一种高性能、高可靠性的分布式存储系统,由Sage Weil于2004年开发,旨在解决大规模数据存储的扩展性、可靠性和性能问题。随着OpenStack日渐成为开源云计算的标准软件栈,Ceph也已经成为OpenStack的首选后端存储。
1)Ceph支持
对象存储:即radosgw,兼容S3接口。通过rest api上传、下载文件。
文件系统:posix接口。可以将Ceph集群看做一个共享文件系统挂载到本地。
块存储:即rbd。有kernel rbd和librbd两种使用方式。支持快照、克隆。相当于一块硬盘挂到本地,用法和用途和硬盘一样。比如在OpenStack项目里,Ceph的块设备存储可以对接OpenStack的后端存储
2)Ceph相比其它分布式存储有哪些优点?
统一存储:虽然Ceph底层是一个分布式文件系统,但由于在上层开发了支持对象和块的接口。所以在开源存储软件中,能够一统江湖。至于能不能千秋万代,就不知了。
高扩展性:扩容方便、容量大。能够管理上千台服务器、EB级的容量。
可靠性强:支持多份强一致性副本,EC。副本能够垮主机、机架、机房、数据中心存放。所以安全可靠。存储节点可以自管理、自动修复。无单点故障,容错性强。
高性能:因为是多个副本,因此在读写操作时候能够做到高度并行化。理论上,节点越多,整个集群的IOPS和吞吐量越高。另外一点Ceph客户端读写数据直接与存储设备(osd) 交互。
3)Ceph各组件介绍
Ceph OSDs: Ceph OSD守护进程(Ceph OSD)的功能是存储数据,处理数据的复制、恢复、回填、再均衡,并通过检查其他OSD 守护进程的心跳来向Ceph Monitors提供一些监控信息。当Ceph存储集群设定为有2个副本时,至少需要2个OSD守护进程,集群才能达到active+clean状态(Ceph 默认有3个副本,但你可以调整副本数)。
Monitors: Ceph Monitor维护着展示集群状态的各种图表,包括监视器图、OSD 图、归置组(PG )图、和CRUSH图。 Ceph保存着发生在Monitors、OSD和PG上的每一次状态变更的历史信息(称为epoch)。
MDSs: Ceph元数据服务器(MDS)为Ceph文件系统存储元数据(也就是说,Ceph 块设备和Ceph对象存储不使用MDS)。元数据服务器使得POSIX文件系统的用户们,可以在不对Ceph存储集群造成负担的前提下,执行诸如ls、find等基本命令。
二、Ceph集群部署
1、系统环境
由ceph1、ceph2、ceph3三台主机组成,其中ceph1、ceph2、ceph3是为Ceph存储集群节点,它们分别作为MON节点和MGR节点和MDS节点和OSD节点,各自拥有专用于存储数据的磁盘设备/dev/sdb,操作系统环境均为CentOS Stream release 9。系统为最小化安装,配置两块磁盘,一块为系统盘,另一块为裸设备(未做分区格式化)。ceph1上安装cephadm用以部署ceph集群。Ceph版本为quincy。
|
操作系统 |
IP地址 |
CPU/内存/磁盘 |
主机名 |
主机角色 |
|
CentOS Stream release 9 |
192.168.10.190 |
4C、8G、200G、1TB |
ceph1 |
mon、mgr、mds、osd |
|
CentOS Stream release 9 |
192.168.10.191 |
4C、8G、200G、1TB |
ceph2 |
mon、mgr、mds、osd |
|
CentOS Stream release 9 |
192.168.10.192 |
4C、8G、200G、1TB |
ceph3 |
mon、mgr、mds、osd |
|
CentOS Stream release 9 |
192.168.10.193 |
2C、4G、200G |
ceph-client |
Ceph客户端 |
2、基础配置
1)关闭防火墙、禁用Selinux
[root@localhost ~]# systemctl stop firewalld
[root@localhost ~]# systemctl disable firewalld
[root@localhost ~]# sed -i 's/SELINUX=enforcing/SELINUX=disabled/' /etc/selinux/config
[root@localhost ~]# setenforce 0
[root@localhost ~]# sed -i '/swap/s/^[^#]/#&/' /etc/fstab
2)配置hosts、主机名
[root@localhost ~]# hostnamectl set-hostname ceph1
[root@localhost ~]# hostnamectl set-hostname ceph2
[root@localhost ~]# hostnamectl set-hostname ceph3
[root@localhost ~]# hostnamectl set-hostname ceph-client
[root@ceph1 ~]# cat >>/etc/hosts <<EOF
192.168.10.190 ceph1
192.168.10.191 ceph2
192.168.10.192 ceph3
EOF
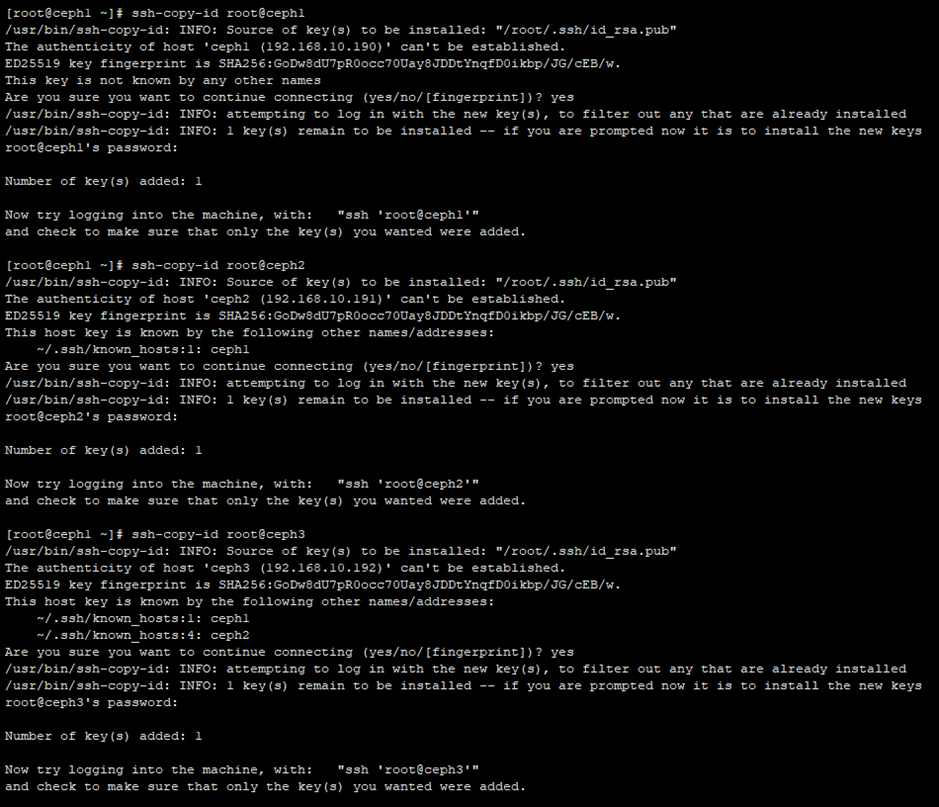
3)配置SSH免密钥
[root@ceph1 ~]# ssh-keygen
[root@ceph1 ~]# ssh-copy-id root@ceph1
[root@ceph1 ~]# ssh-copy-id root@ceph2
[root@ceph1 ~]# ssh-copy-id root@ceph3
4)安装epel源
[root@ceph1 ~]# yum -y install epel-release
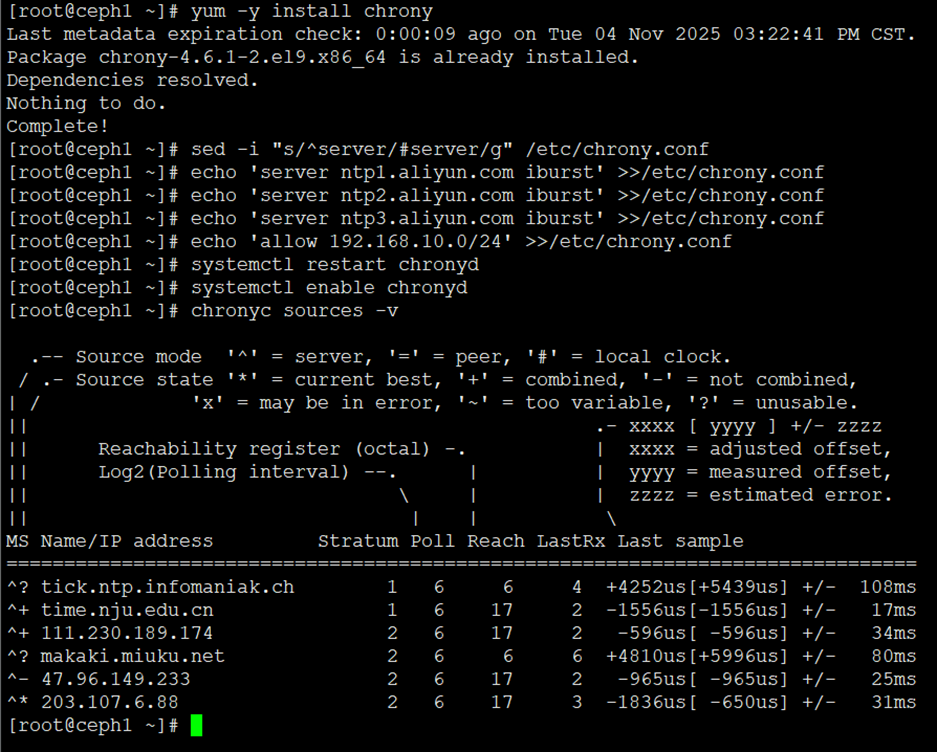
5)配置时间同步
[root@ceph1 ~]# yum -y install chrony
[root@ceph1 ~]# sed -i "s/^server/#server/g" /etc/chrony.conf
[root@ceph1 ~]# echo 'server ntp1.aliyun.com iburst' >>/etc/chrony.conf
[root@ceph1 ~]# echo 'server ntp2.aliyun.com iburst' >>/etc/chrony.conf
[root@ceph1 ~]# echo 'server ntp3.aliyun.com iburst' >>/etc/chrony.conf
[root@ceph1 ~]# echo 'allow 192.168.10.0/24' >>/etc/chrony.conf
[root@ceph1 ~]# systemctl restart chronyd
[root@ceph1 ~]# systemctl enable chronyd
[root@ceph1 ~]# chronyc sources -v
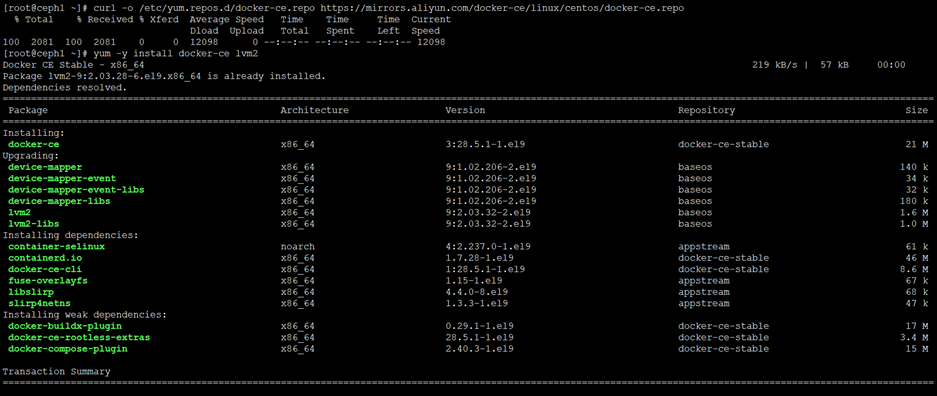
5)安装Docker
[root@ceph1 ~]# curl -o /etc/yum.repos.d/docker-ce.repo https://mirrors.aliyun.com/docker-ce/linux/centos/docker-ce.repo
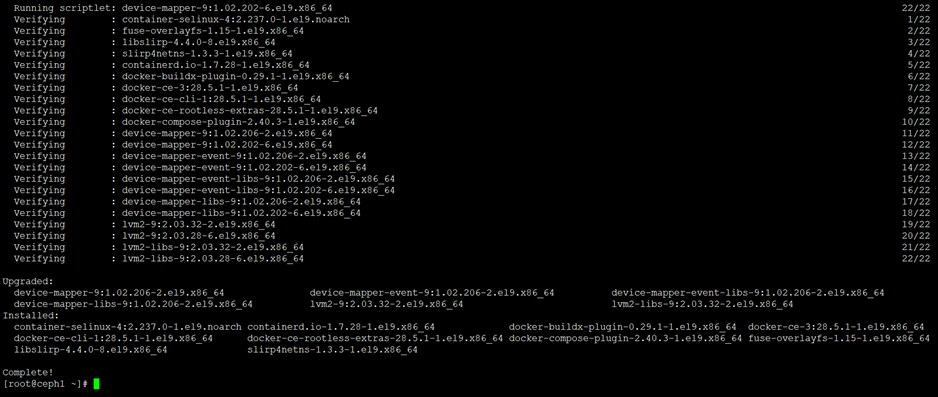
[root@ceph1 ~]# yum -y install docker-ce lvm2
# 启动Docker并配置开机自启动
[root@ceph1 ~]# systemctl start docker
[root@ceph1 ~]# systemctl enable docker
3、安装Ceph集群
# Ceph官方的仓库:https://download.ceph.com/
1)配置阿里云Ceph源
[root@ceph1 ~]# vim /etc/yum.repos.d/ceph.repo
|
[ceph] name=ceph baseurl=http://mirrors.aliyun.com/ceph/rpm-quincy/el9/x86_64/ enabled=1 gpgcheck=0 priority=1 [ceph-noarch] name=cephnoarch baseurl=http://mirrors.aliyun.com/ceph/rpm-quincy/el9/noarch/ enabled=1 gpgcheck=0 priority=1 [ceph-source] name=Ceph source packages baseurl=http://mirrors.aliyun.com/ceph/rpm-quincy/el9/SRPMS enabled=1 gpgcheck=0 priority=1 |
2)安装cephadm工具(ceph1节点)
[root@ceph1 ~]# yum -y install cephadm
3)初始化集群
[root@ceph1 ~]# cephadm bootstrap --mon-ip 192.168.10.190
4)Shell命令
# 切换模式
[root@ceph1 ~]# cephadm shell
# 查看Ceph集群状态
[ceph: root@ceph1 /]# ceph -s
# 查看集群内运行组件(包括其他节点)
[ceph: root@ceph1 /]# ceph orch ps
# 查看集群内某个组件运行状态
[ceph: root@ceph1 /]# ceph orch ps --daemon-type mon
# 第二种运行方式
[root@ceph1 ~]# cephadm shell -- ceph -s
5)安装ceph-common
[root@ceph1 ~]# cephadm install ceph-common
或者
[root@ceph1 ~]# yum -y install ceph-common
[root@ceph2 ~]# yum -y install ceph-common
[root@ceph3 ~]# yum -y install ceph-common
# 查看Ceph版本
[root@ceph1 ~]# ceph -v
ceph version 17.2.9 (69bf48f20731a4b0d742613f6c6335ccb54dd217) quincy (stable)
# 拷贝Ceph密钥
[root@ceph1 ~]# ssh-copy-id -f -i /etc/ceph/ceph.pub root@ceph2
[root@ceph1 ~]# ssh-copy-id -f -i /etc/ceph/ceph.pub root@ceph3
7)创建MGR和Mon
# 创建mon和mgr
[root@ceph1 ~]# ceph orch host add ceph2
Added host 'ceph2' with addr '192.168.10.191'
[root@ceph1 ~]# ceph orch host add ceph3
Added host 'ceph3' with addr '192.168.10.192'
# 查看集群节点
[root@ceph1 ~]# ceph orch host ls
# Ceph集群默认会允许存在5个mon和2个mgr,可以使用ceph orch apply手动修改
[root@ceph1 ~]# ceph orch apply mon --placement="3 ceph1 ceph2 ceph3"
Scheduled mon update...
[root@ceph1 ~]# ceph orch apply mgr --placement="3 ceph1 ceph2 ceph3"
Scheduled mgr update...
# 列出集群中所有服务状态
[root@ceph1 ~]# ceph orch ls
8)创建OSD
# 列出集群内的存储设备
[root@ceph1 ~]# ceph orch device ls
# 创建OSD
[root@ceph1 ~]# ceph orch daemon add osd ceph1:/dev/sdb
[root@ceph1 ~]# ceph orch daemon add osd ceph2:/dev/sdb
[root@ceph1 ~]# ceph orch daemon add osd ceph3:/dev/sdb
[root@ceph1 ~]# cephadm shell -- ceph -s
4、Ceph文件存储
1)创建MDS
# 创建存储池(集群中单个池的PG数计算公式如下:PG总数=(OSD数*100)/最大副本数/池数)
[root@ceph1 ~]# ceph osd pool create cephfs-data 64
[root@ceph1 ~]# ceph osd pool create cephfs-metadata 64
[root@ceph1 ~]# ceph osd pool ls
2)创建文件系统
[root@ceph1 ~]# ceph fs new cephfs cephfs-metadata cephfs-data
# 出现Pool 'cephfs-data' (id '2') has pg autoscale mode 'on' but is not marked as bulk(此消息表明您的cepfs数据池启用了PG自动伸缩,但未将其标记为"批量"池)
# 将存储池标记为Bulk(如果存储大数据,建议使用)
[root@ceph1 ~]# ceph osd pool set cephfs-data bulk true
[root@ceph1 ~]# ceph fs ls
[root@ceph1 ~]# ceph df
# 开启mds组件(指定集群内3个mds)
[root@ceph1 ~]# ceph orch apply mds cephfs --placement="3 ceph1 ceph2 ceph3"
# 查看各节点是否已启用mds容器
[root@ceph1 ~]# ceph orch ps --daemon-type mds
3)创建RGW
# 创建领域
[root@ceph1 ~]# radosgw-admin realm create --rgw-realm=org --default
# 创建区域组
[root@ceph1 ~]# radosgw-admin zonegroup create --rgw-zonegroup=default --master --default
# 创建区域
[root@ceph1 ~]# radosgw-admin zone create --rgw-zonegroup=default --rgw-zone=cn-east-1 --master --default
# 特定领域和区域部署radosgw守护程序
[root@ceph1 ~]# ceph orch apply rgw org cn-east-1 --placement="3 ceph1 ceph2 ceph3"
# 验证各节点是否启动rgw容器
[root@ceph1 ~]# ceph orch ps --daemon-type rgw
# 拷贝Ceph集群的管理员密钥和配置文件到其他节点
[root@ceph1 ~]# scp /etc/ceph/ceph.conf /etc/ceph/ceph.client.admin.keyring root@ceph2:/etc/ceph/
[root@ceph1 ~]# scp /etc/ceph/ceph.conf /etc/ceph/ceph.client.admin.keyring root@ceph3:/etc/ceph/
4)生成客户端访问存储池密钥
# clientfs
[root@ceph1 ~]# cd /etc/ceph
[root@ceph1 ceph]# ceph auth get-or-create client.clientfs mon 'allow r' mds 'allow rw' osd 'allow * pool=cephfs-data,allow * pool=cephfs-metadata' -o ceph.client.clientfs.keyring
[root@ceph1 ceph]# ceph auth get client.clientfs
[root@ceph1 ceph]# ceph auth print-key client.clientfs >/etc/ceph/clientfs.key
# 客户端
[root@ceph-client ~]# mkdir -p /etc/ceph
[root@ceph1 ceph]# scp /etc/ceph/ceph.client.clientfs.keyring /etc/ceph/ceph.conf /etc/ceph/clientfs.key 192.168.10.193:/etc/ceph/
5)客户端挂载
# 客户端通过内核中的cephfs文件系统接口即可挂载使用cephfs文件系统或者通过FUSE接口与文件系统进行交互。
# 内核文件系统
[root@ceph-client ~]# yum -y install ceph-common ceph-fuse
[root@ceph-client ~]# mkdir -p /mnt/fs/
[root@ceph-client ~]# ls -l /etc/ceph/
[root@ceph-client ~]# cat /etc/hosts
[root@ceph-client ~]# mount.ceph ceph1:6789,ceph2:6789,ceph3:6789:/ /mnt/fs/ -o name=clientfs,secretfile=/etc/ceph/clientfs.key
# 写入测试数据
[root@ceph-client ~]# df -h
[root@ceph-client ~]# echo 'hello fs' >/mnt/fs/index.html
[root@ceph-client ~]# cat /mnt/fs/index.html
# 配置开机自动挂载
[root@ceph-client ~]# echo "ceph1:6789,ceph2:6789,ceph3:6789:/ /mnt/fs ceph name=clientfs,secretfile=/etc/ceph/clientfs.key,_netdev,noatime 0 0" >>/etc/fstab
[root@ceph-client ~]# cat /etc/fstab
# 用户空间文件系统(Fuse)
[root@ceph-client ~]# mkdir -p /mnt/fuse
[root@ceph-client ~]# ceph-fuse -n client.clientfs -m ceph1:6789,ceph2:6789,ceph3:6789 /mnt/fuse
[root@ceph-client ~]# df -h
# 写入测试数据
[root@ceph-client ~]# echo 'hello fuse' >/mnt/fuse/index.html
[root@ceph-client ~]# cat /mnt/fuse/index.html
# 配置开机自动挂载
[root@ceph-client ~]# echo "none /mnt/fuse fuse.ceph ceph.id=clientfs,ceph.conf=/etc/ceph/ceph.conf,_netdev,defaults 0 0" >>/etc/fstab
[root@ceph-client ~]# cat /etc/fstab
5、Ceph块存储
1)创建块存储
[root@ceph1 ceph]# ceph osd pool create rbd_pool 32
[root@ceph1 ceph]# ceph osd pool ls
2)创建客户端账号
[root@ceph1 ceph]# ceph auth get-or-create client.rbd mon 'allow r' osd 'allow class-read object_prefix rbd_children, allow rwx pool=rbd_pool'
[root@ceph1 ceph]# ceph auth get client.rbd
3)生成客户端keyring
[root@ceph1 ceph]# ceph auth get client.rbd -o /etc/ceph/ceph.client.rbd.keyring
[root@ceph1 ceph]# cat /etc/ceph/ceph.client.rbd.keyring
# 拷贝keyring到客户端
[root@ceph1 ceph]# scp /etc/ceph/ceph.client.rbd.keyring 192.168.10.193:/etc/ceph/
4)启动RBD
[root@ceph1 ceph]# ceph osd pool application enable rbd_pool rbd_pool
5)客户端操作
# 查看Ceph集群状态
[root@ceph-client ~]# ceph -s --id rbd
# 创建image
[root@ceph-client ~]# rbd create rbd -p rbd_pool --size 1G --id rbd
[root@ceph-client ~]# rbd ls -l rbd_pool --id rbd
[root@ceph-client ~]# rbd info -p rbd_pool rbd --id rbd
# 禁用镜像特性(作为rbd一般只需要layering,需要把其他的特性全部禁止掉)
[root@ceph-client ~]# rbd feature disable -p rbd_pool rbd exclusive-lock, object-map, fast-diff, deep-flatten --id rbd
[root@ceph-client ~]# rbd info -p rbd_pool rbd --id rbd
# 挂载image
[root@ceph-client ~]# lsblk
[root@ceph-client ~]# rbd ls -l rbd_pool --id rbd
[root@ceph-client ~]# rbd map -p rbd_pool rbd --id rbd
[root@ceph-client ~]# lsblk
# 初始化文件系统及挂载
# 格式化磁盘
[root@ceph-client ~]# mkfs.xfs /dev/rbd0
# 创建挂载目录
[root@ceph-client ~]# mkdir /mnt/rbd
[root@ceph-client ~]# mount /dev/rbd0 /mnt/rbd/
[root@ceph-client ~]# df -h
# 写入测试数据
[root@ceph-client ~]# echo 'hello rbd' >/mnt/rbd/index.html
[root@ceph-client ~]# cat /mnt/rbd/index.html
# 配置开机自动挂载
[root@ceph-client ~]# echo "/dev/rbd0 /mnt/rbd xfs defaults,_netdev 0 0" >>/etc/fstab
[root@ceph-client ~]# cat /etc/fstab
6)客户端卸载
# 块存储
# 卸载
[root@ceph-client ~]# umount /mnt/rbd
[root@ceph-client ~]# df -h
# 卸载image
[root@ceph-client ~]# rbd showmapped --id rbd
[root@ceph-client ~]# rbd unmap -p rbd_pool rbd --id rbd
[root@ceph-client ~]# rbd showmapped --id rbd
# 删除image
[root@ceph-client ~]# rbd ls -l rbd_pool --id rbd
[root@ceph-client ~]# rbd rm -p rbd_pool rbd --id rbd
# 移除开机自动挂载
[root@ceph-client ~]# sed -i '/rbd0/d' /etc/fstab
[root@ceph-client ~]# cat /etc/fstab
# 查看存储池
[root@ceph1 ceph]# ceph osd pool ls
# 删除pool
[root@ceph1 ceph]# ceph osd pool rm rbd_pool rbd_pool --yes-i-really-really-mean-it
Error EPERM: pool deletion is disabled; you must first set the mon_allow_pool_delete config option to true before you can destroy a pool
# 临时关闭误删除存储池保护
[root@ceph1 ceph]# ceph config set mon mon_allow_pool_delete true
# 删除pool
[root@ceph1 ceph]# ceph osd pool rm rbd_pool rbd_pool --yes-i-really-really-mean-it
pool 'rbd_pool' removed
# 查看存储池
[root@ceph1 ceph]# ceph osd pool ls
# 删除用户keyring
[root@ceph1 ceph]# ceph auth ls
[root@ceph1 ceph]# ceph auth rm client.rbd
# 开启误删除存储池保护
[root@ceph1 ceph]# ceph config set mon mon_allow_pool_delete false
# 内核文件系统
[root@ceph-client ~]# df -h
# 卸载
[root@ceph-client ~]# umount /mnt/fs
[root@ceph-client ~]# df -h
# 移除开机自动挂载
[root@ceph-client ~]# sed -i '/clientfs.key/d' /etc/fstab
[root@ceph-client ~]# cat /etc/fstab
# 用户空间文件系统(Fuse)
[root@ceph-client ~]# df -h
# 卸载
[root@ceph-client ~]# umount /mnt/fuse
[root@ceph-client ~]# df -h
# 移除开机自动挂载
[root@ceph-client ~]# sed -i '/clientfs/d' /etc/fstab
[root@ceph-client ~]# cat /etc/fstab
6、配置Dashboard
# Ceph提供了原生的Dashboard功能,通过ceph dashboard完成对Ceph存储系统可视化监视。
1)登陆验证
# 浏览器输入https://192.168.10.190:8443,如下图所示
2)修改为中文(简体)
3)输入用户名(admin)密码(fzmgvrtjd9),前面初始化集群会默认生成用户名密码
4)更改密码
5)登陆成功界面
若文章图片、下载链接等信息出错,请在评论区留言反馈,博主将第一时间更新!如本文“对您有用”,欢迎随意打赏,谢谢!


评论