
一、lnmp简介
LNMP代表的就是:Linux系统下Nginx+MySQL+PHP这种网站服务器架构。
Linux是一类Unix计算机操作系统的统称,是目前最流行的免费操作系统。代表版本有:debian、centos、ubuntu、fedora、gentoo等。
Nginx是一个高性能的HTTP和反向代理服务器,也是一个IMAP/POP3/SMTP代理服务器。
Mysql是一个小型关系型数据库管理系统。
PHP是一种在服务器端执行的嵌入HTML文档的脚本语言。
这四种软件均为免费开源软件,组合到一起,成为一个免费、高效、扩展性强的网站服务系统。
二、Centos 7安装lnmp、wordpress
1、Yum安装Nginx
1)配置Centos 7 Nginx Yum源仓库
[root@localhost ~]# rpm -Uvh http://nginx.org/packages/centos/7/noarch/RPMS/nginx-release-centos-7-0.el7.ngx.noarch.rpm
Retrieving http://nginx.org/packages/centos/7/noarch/RPMS/nginx-release-centos-7-0.el7.ngx.noarch.rpm
warning: /var/tmp/rpm-tmp.PiXlZn: Header V4 RSA/SHA1 Signature, key ID 7bd9bf62: NOKEY
Preparing... ################################# [100%]
Updating / installing...
1:nginx-release-centos-7-0.el7.ngx ################################# [100%]
2)安装Nginx
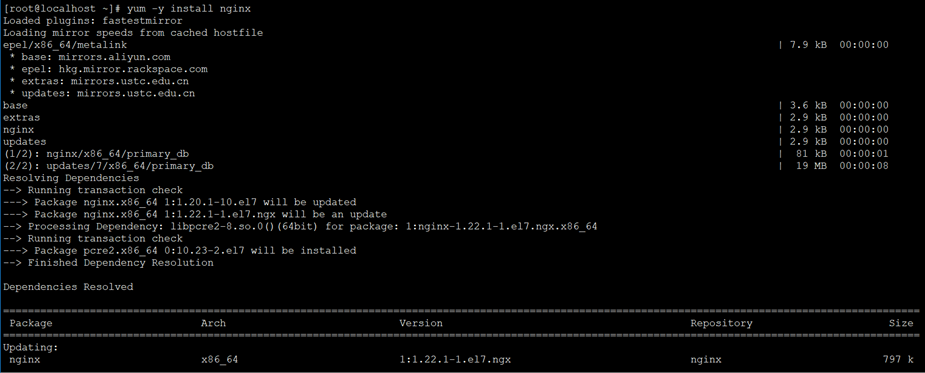
[root@localhost ~]# yum -y install nginx
3)启动Nginx
[root@localhost ~]# systemctl start nginx
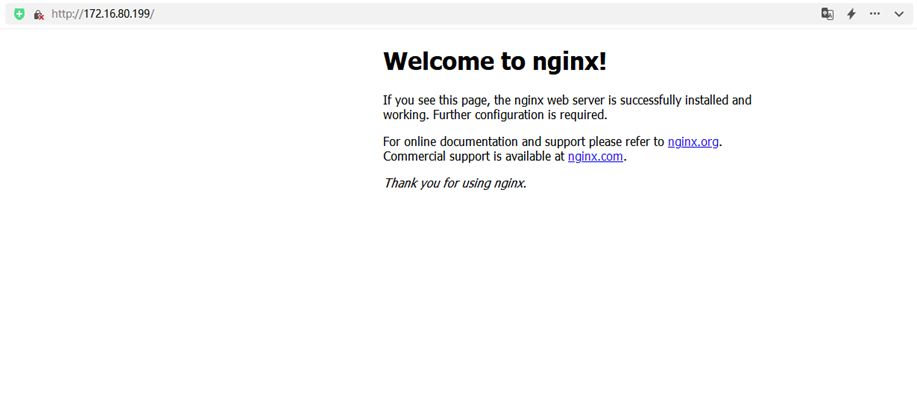
4)访问Nginx
5)Nginx默认地址和配置
/etc/nginx/nginx.conf # Yum安装Nginx默认主配置文件
/usr/share/nginx/html # Nginx默认存放目录
/usr/share/nginx/html/index.html # Nginx默认主页路径
6)常用基本操作
1、启动Nginx
[root@localhost ~]# systemctl start nginx
2、停止Nginx
[root@localhost ~]# systemctl stop nginx
3、重载Nginx
[root@localhost ~]# systemctl reload nginx
4、重启Nginx
[root@localhost ~]# systemctl restart nginx
5、查询Nginx运行状态
[root@localhost ~]# systemctl status nginx
6、查询Nginx进程
[root@localhost ~]# ps -ef |grep nginx
7、查询Nginx监听端口
[root@localhost ~]# netstat -lntup |grep nginx
8、卸载Nginx
[root@localhost ~]# yum -y remove nginx
9、RPM方式安装升级指定版本Nginx
[root@localhost ~]# rpm -Uvh http://nginx.org/packages/centos/7/x86_64/RPMS/nginx-1.22.0-1.el7.ngx.x86_64.rpm
2、Yum安装MySQL
1)配置清华大学Yum源
[root@localhost ~]# vim /etc/yum.repos.d/mysql-community.repo
[mysql-connectors-community]
name=MySQL Connectors Community
baseurl=https://mirrors.tuna.tsinghua.edu.cn/mysql/yum/mysql-connectors-community-el7-$basearch/
enabled=1
gpgcheck=1
gpgkey=https://repo.mysql.com/RPM-GPG-KEY-mysql

[mysql-tools-community]
name=MySQL Tools Community
baseurl=https://mirrors.tuna.tsinghua.edu.cn/mysql/yum/mysql-tools-community-el7-$basearch/
enabled=1
gpgcheck=1
gpgkey=https://repo.mysql.com/RPM-GPG-KEY-mysql

[mysql-5.7-community]
name=MySQL 5.7 Community Server
baseurl=https://mirrors.tuna.tsinghua.edu.cn/mysql/yum/mysql-5.7-community-el7-$basearch/
enabled=1
gpgcheck=0
gpgkey=https://repo.mysql.com/RPM-GPG-KEY-mysql
2)安装MySQL-5.7
[root@localhost ~]# yum -y install mysql-community-server
3)启动MySQL
[root@localhost ~]# systemctl start mysqld
4)登录MySQL
1、查看初始化后生成的密码
[root@localhost ~]# grep 'password' /var/log/mysqld.log
2022-12-14T07:48:14.697319Z 1 [Note] A temporary password is generated for root@localhost: j!#kVpr6_e:!
2、登录MySQL
[root@localhost ~]# mysql -uroot -p'j!#kVpr6_e:!'
mysql: [Warning] Using a password on the command line interface can be insecure.
Welcome to the MySQL monitor. Commands end with ; or \g.
Your MySQL connection id is 6
Server version: 5.7.40
Copyright (c) 2000, 2022, Oracle and/or its affiliates.
Oracle is a registered trademark of Oracle Corporation and/or its
affiliates. Other names may be trademarks of their respective
owners.
Type 'help;' or '\h' for help. Type '\c' to clear the current input statement.
# 初始化后需重置密码才能执行sql
mysql> set password=password('Aa123456@!');
Query OK, 0 rows affected, 1 warning (0.00 sec)
mysql> select version();
+------------+
| version() |
+------------+
| 5.7.40 |
+------------+
1 row in set (0.00 sec)
3、Yum安装PHP
1)安装remi扩展源
remi源是Remi repository是包含最新版本PHP和MySQL包的Linux源,由Remi提供维护。有这个源之后,使用YUM安装或更新PHP、MySQL、phpMyAdmin等服务器相关程序的时候就非常方便了。
[root@localhost ~]# yum -y install epel-release
[root@localhost ~]# yum -y install http://rpms.remirepo.net/enterprise/remi-release-7.rpm
2)安装YUM管理工具
[root@localhost ~]# yum -y install yum-utils
3)安装PHP
[root@localhost ~]# yum -y install php74-php-cli php74-php-common php74-php-devel php74-php-embedded php74-php-fpm php74-php-gd php74-php-mbstring php74-php-mysqlnd php74-php-pdo php74-php-opcache php74-php-xml php74-php-soap
4)查看是否安装成功及php配置文件以及对应目录
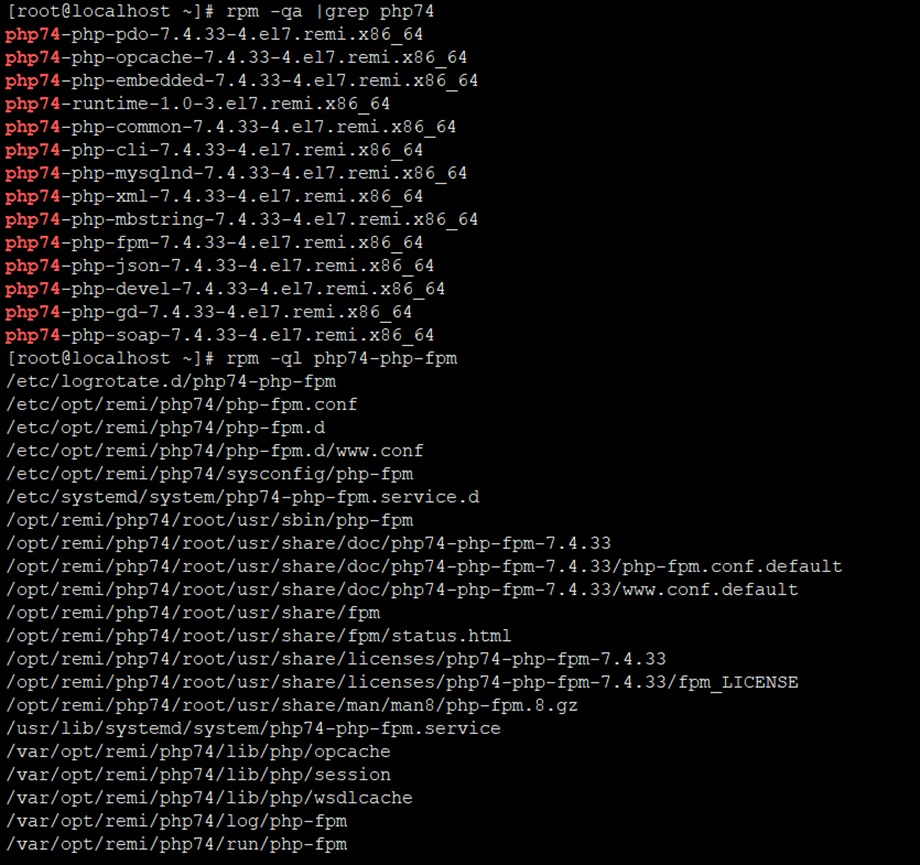
[root@localhost ~]# rpm -qa |grep php74
[root@localhost ~]# rpm -ql php74-php-fpm
5)建立软连接
[root@localhost ~]# ln -sf /opt/remi/php74/root/usr/bin/php* /usr/local/bin
6)查看PHP版本
[root@localhost ~]# php -v
PHP 7.4.33 (cli) (built: Feb 14 2023 08:49:52) ( NTS )
Copyright (c) The PHP Group
Zend Engine v3.4.0, Copyright (c) Zend Technologies
with Zend OPcache v7.4.33, Copyright (c), by Zend Technologies
7)启动PHP-FPM
[root@localhost ~]# systemctl start php74-php-fpm
8)设置开机自启动
[root@localhost ~]# systemctl enable php74-php-fpm
9)常用基本操作
1、启动PHP
[root@localhost ~]# systemctl start php74-php-fpm
2、停止PHP
[root@localhost ~]# systemctl stop php74-php-fpm
3、重载PHP
[root@localhost ~]# systemctl reload php74-php-fpm
4、重启PHP
[root@localhost ~]# systemctl restart php74-php-fpm
5、查询PHP运行状态
[root@localhost ~]# systemctl status php74-php-fpm
6、查询PHP进程
[root@localhost ~]# ps -ef |grep php-fpm
7、查询PHP监听端口
[root@localhost ~]# netstat -lntup |grep php-fpm
8、卸载PHP
[root@localhost ~]# yum -y remove php74*
三、Centos 6安装lnmp、wordpress
1、Yum安装Nginx
1)配置Centos 6 Nginx Yum源仓库
[root@localhost ~]# rpm -Uvh http://nginx.org/packages/centos/6/noarch/RPMS/nginx-release-centos-6-0.el6.ngx.noarch.rpm
Retrieving http://nginx.org/packages/centos/6/noarch/RPMS/nginx-release-centos-6-0.el6.ngx.noarch.rpm
warning: /var/tmp/rpm-tmp.xRiIYI: Header V4 RSA/SHA1 Signature, key ID 7bd9bf62: NOKEY
Preparing... ########################################### [100%]
1:nginx-release-centos ########################################### [100%]
2)安装Nginx
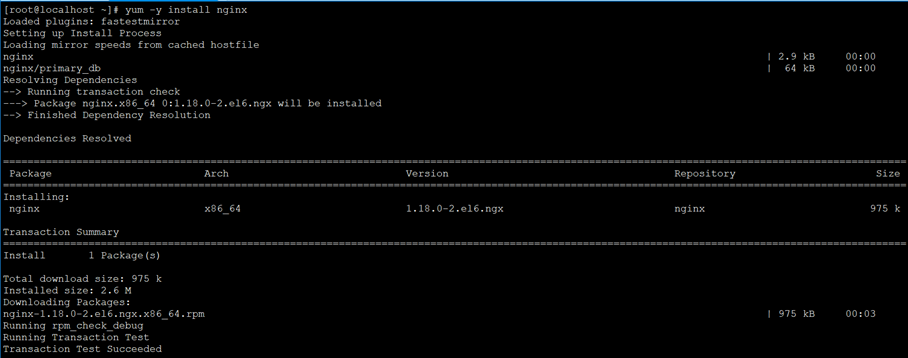
[root@localhost ~]# yum -y install nginx
3)启动Nginx
[root@localhost ~]# /etc/init.d/nginx start
4)访问Nginx
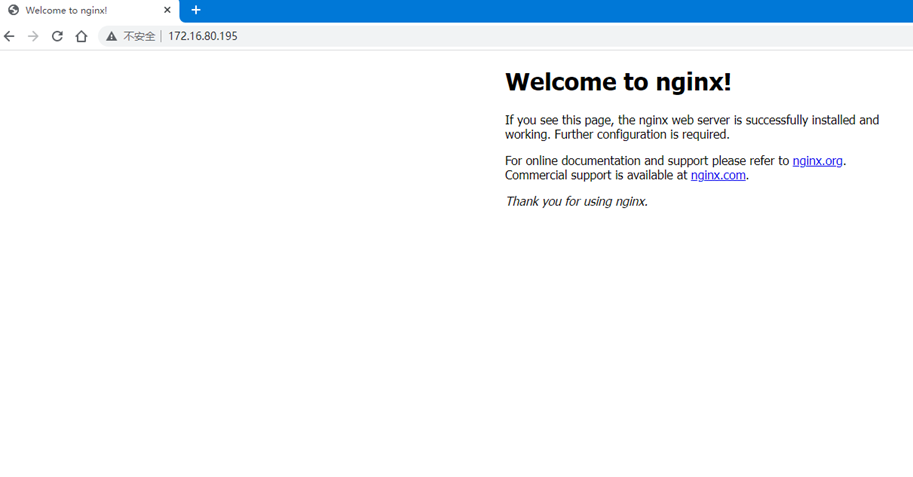
5)Nginx默认地址和配置
/etc/nginx/nginx.conf # Yum安装Nginx默认主配置文件
/usr/share/nginx/html # Nginx默认存放目录
/usr/share/nginx/html/index.html # Nginx默认主页路径
6)常用基本操作
1、启动Nginx
[root@localhost ~]# /etc/init.d/nginx start
2、停止Nginx
[root@localhost ~]# /etc/init.d/nginx stop
3、重载Nginx
[root@localhost ~]# /etc/init.d/nginx reload
4、重启Nginx
[root@localhost ~]# /etc/init.d/nginx restart
5、查询Nginx运行状态
[root@localhost ~]# /etc/init.d/nginx status
6、查询Nginx进程
[root@localhost ~]# ps -ef |grep nginx
7、查询Nginx监听端口
[root@localhost ~]# netstat -lntup |grep nginx
8)卸载Nginx
[root@localhost ~]# yum -y remove nginx
9)RPM方式安装升级指定版本Nginx
[root@localhost ~]# rpm -Uvh http://nginx.org/packages/centos/6/x86_64/RPMS/nginx-1.18.0-1.el6.ngx.x86_64.rpm
2、Yum安装MySQL
1)配置清华大学Yum源
[root@localhost ~]# vim /etc/yum.repos.d/mysql-community.repo
[mysql-connectors-community]
name=MySQL Connectors Community
baseurl=http://repo.mysql.com/yum/mysql-connectors-community/el/6/$basearch
enabled=1
gpgcheck=1
gpgkey=file:///etc/pki/rpm-gpg/RPM-GPG-KEY-mysql

[mysql-tools-community]
name=MySQL Tools Community
baseurl=http://repo.mysql.com/yum/mysql-tools-community/el/6/$basearch
enabled=1
gpgcheck=1
gpgkey=file:///etc/pki/rpm-gpg/RPM-GPG-KEY-mysql

[mysql57-community]
name=MySQL 5.7 Community Server
baseurl=http://repo.mysql.com/yum/mysql-5.7-community/el/6/$basearch
enabled=1
gpgcheck=0
gpgkey=file:///etc/pki/rpm-gpg/RPM-GPG-KEY-mysql
2)安装MySQL-5.7
[root@localhost ~]# yum -y install mysql-community-server
3)启动MySQL
[root@localhost ~]# service mysqld start
4)登录MySQL
1、查看初始化后生成的密码
[root@localhost ~]# grep 'password' /var/log/mysqld.log
2023-03-15T16:28:58.400769Z 1 [Note] A temporary password is generated for root@localhost: #wudap(Sy32q
2、登录MySQL
[root@localhost ~]# mysql -uroot -p'#wudap(Sy32q'
mysql: [Warning] Using a password on the command line interface can be insecure.
Welcome to the MySQL monitor. Commands end with ; or \g.
Your MySQL connection id is 4
Server version: 5.7.41
Copyright (c) 2000, 2023, Oracle and/or its affiliates.
Oracle is a registered trademark of Oracle Corporation and/or its
affiliates. Other names may be trademarks of their respective
owners.
Type 'help;' or '\h' for help. Type '\c' to clear the current input statement.
# 初始化后需重置密码才能执行sql
mysql> set password=password('Aa123456@!');
Query OK, 0 rows affected, 1 warning (0.00 sec)
mysql> select version();
+------------+
| version() |
+------------+
| 5.7.41 |
+------------+
1 row in set (0.00 sec)
3、Yum安装PHP
1)安装remi扩展源
remi源是Remi repository是包含最新版本PHP和MySQL包的Linux源,由Remi提供维护。有这个源之后,使用YUM安装或更新PHP、MySQL、phpMyAdmin等服务器相关程序的时候就非常方便了。
[root@localhost ~]# yum -y install epel-release
[root@localhost ~]# yum -y install http://rpms.remirepo.net/enterprise/remi-release-6.rpm
2)安装YUM管理工具
[root@localhost ~]# yum -y install yum-utils
3)安装PHP
[root@localhost ~]# yum -y install php73-php-cli php73-php-common php73-php-devel php73-php-embedded php73-php-fpm php73-php-gd php73-php-mbstring php73-php-mysqlnd php73-php-pdo php73-php-opcache php73-php-xml php73-php-soap
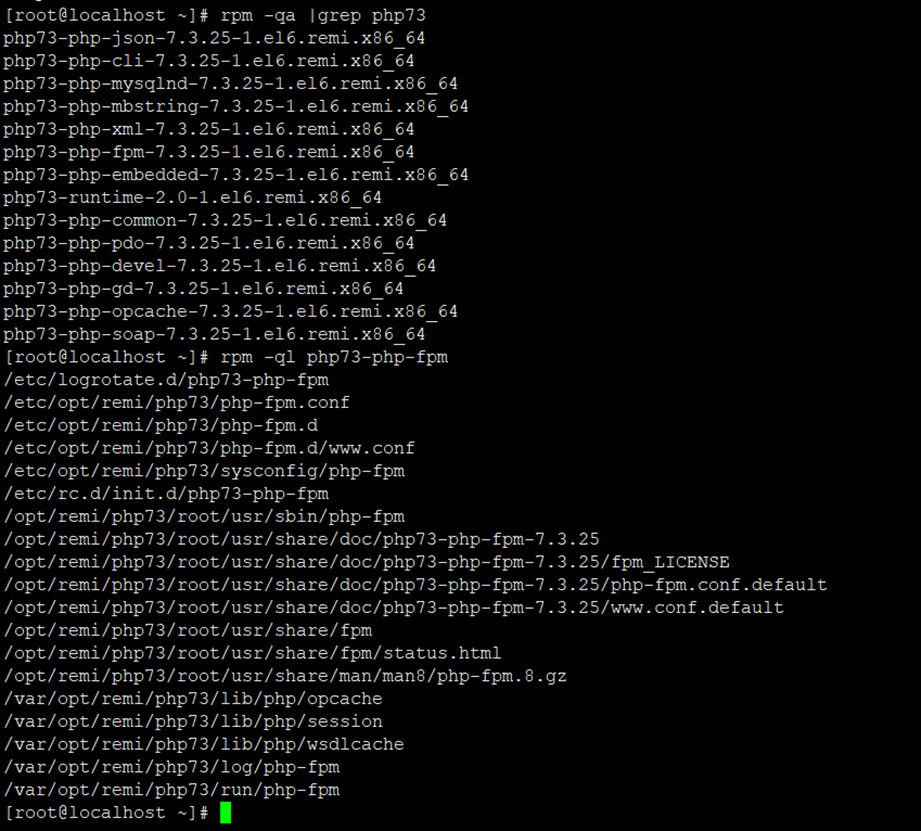
4)查看是否安装成功及php配置文件以及对应目录
[root@localhost ~]# rpm -qa |grep php73
[root@localhost ~]# rpm -ql php73-php-fpm
5)建立软连接
[root@localhost ~]# ln -sf /opt/remi/php73/root/usr/bin/php* /usr/local/bin
6)查看PHP版本
[root@localhost ~]# php -v
PHP 7.3.25 (cli) (built: Nov 24 2020 14:22:04) ( NTS )
Copyright (c) 1997-2018 The PHP Group
Zend Engine v3.3.25, Copyright (c) 1998-2018 Zend Technologies
with Zend OPcache v7.3.25, Copyright (c) 1999-2018, by Zend Technologies
7)启动PHP-FPM
[root@localhost ~]# service php73-php-fpm start
8)设置开机自启动
[root@localhost ~]# chkconfig php73-php-fpm on
9)常用基本操作
1、启动PHP
[root@localhost ~]# service php73-php-fpm start
2、停止PHP
[root@localhost ~]# service php73-php-fpm stop
3、重载PHP
[root@localhost ~]# service php73-php-fpm reload
4、重启PHP
[root@localhost ~]# service php73-php-fpm restart
5、查询PHP运行状态
[root@localhost ~]# service php73-php-fpm status
6、查询PHP进程
[root@localhost ~]# ps -ef |grep php-fpm
7、查询PHP监听端口
[root@localhost ~]# netstat -lntup |grep php-fpm
8、卸载PHP
[root@localhost ~]# yum -y remove php73*
若文章图片、下载链接等信息出错,请在评论区留言反馈,博主将第一时间更新!如本文“对您有用”,欢迎随意打赏,谢谢!


评论