
一、Nacos简介
Nacos /nɑ:kəʊs/是Dynamic Naming and Configuration Service的首字母简称,一个更易于构建云原生应用的动态服务发现、配置管理和服务管理平台。
Nacos主要提供三种功能:服务注册与发现、动态配置服务、动态DNS服务。
二、安装Nacos集群
1、集群部署环境准备
|
序号 |
IP地址 |
操作系统 |
用途 |
|
1 |
192.168.0.197 |
CentOS 7.9.2009 |
Nacos+JDK |
|
2 |
192.168.0.198 |
CentOS 7.9.2009 |
Nacos+JDK |
|
3 |
192.168.0.199 |
CentOS 7.9.2009 |
Nacos+JDK |
|
4 |
192.168.0.200 |
CentOS 7.9.2009 |
MySQL+Nginx |
2、安装JDK
JDK下载地址:https://www.oracle.com/cn/java/technologies/javase/jdk11-archive-downloads.html
1)安装JDK-11.0.17
[root@localhost ~]# yum -y install jdk-11.0.17_linux-x64_bin.rpm
2)查看是否安装成功
[root@localhost ~]# java -version
java version "11.0.17" 2022-10-18 LTS
Java(TM) SE Runtime Environment 18.9 (build 11.0.17+10-LTS-269)
Java HotSpot(TM) 64-Bit Server VM 18.9 (build 11.0.17+10-LTS-269, mixed mode)
注意:所有Nacos节点需要安装
3、安装MySQL
1)配置清华大学Yum源
[root@localhost ~]# vim /etc/yum.repos.d/mysql-community.repo
[mysql-connectors-community]
name=MySQL Connectors Community
baseurl=https://mirrors.tuna.tsinghua.edu.cn/mysql/yum/mysql-connectors-community-el7-$basearch/
enabled=1
gpgcheck=1
gpgkey=https://repo.mysql.com/RPM-GPG-KEY-mysql

[mysql-tools-community]
name=MySQL Tools Community
baseurl=https://mirrors.tuna.tsinghua.edu.cn/mysql/yum/mysql-tools-community-el7-$basearch/
enabled=1
gpgcheck=1
gpgkey=https://repo.mysql.com/RPM-GPG-KEY-mysql

[mysql-5.7-community]
name=MySQL 5.7 Community Server
baseurl=https://mirrors.tuna.tsinghua.edu.cn/mysql/yum/mysql-5.7-community-el7-$basearch/
enabled=1
gpgcheck=0
gpgkey=https://repo.mysql.com/RPM-GPG-KEY-mysql
2)安装MySQL-5.7
[root@localhost ~]# yum -y install mysql-community-server
3)启动MySQL
[root@localhost ~]# systemctl start mysqld
4)登录MySQL
1、查看初始化后生成的密码
[root@localhost ~]# grep 'password' /var/log/mysqld.log
2023-03-25T12:54:39.593636Z 1 [Note] A temporary password is generated for root@localhost: hiPZY4U6yZ_6
2、登录MySQL
[root@localhost ~]# mysql -uroot -p'hiPZY4U6yZ_6'
Welcome to the MySQL monitor. Commands end with ; or \g.
Your MySQL connection id is 3
Server version: 5.7.42-log MySQL Community Server (GPL)
Copyright (c) 2000, 2023, Oracle and/or its affiliates.
Oracle is a registered trademark of Oracle Corporation and/or its
affiliates. Other names may be trademarks of their respective
owners.
Type 'help;' or '\h' for help. Type '\c' to clear the current input statement.
3、初始化后需重置密码才能执行sql
mysql> set password=password('Aa123456@!');
Query OK, 0 rows affected, 1 warning (0.00 sec)
mysql> flush privileges;
Query OK, 0 rows affected (0.00 sec)
mysql> select version();
+--------------+
| version() |
+--------------+
| 5.7.42-log |
+--------------+
1 row in set (0.00 sec)
4、安装Nacos
1)下载Nacos软件包
[root@localhost ~]# wget https://github.com/alibaba/nacos/releases/download/1.4.3/nacos-server-1.4.3.zip
2)解压
[root@localhost ~]# unzip nacos-server-1.4.3.zip -d /usr/local
3)修改startup.sh启动脚本
[root@localhost ~]# vim /usr/local/nacos/bin/startup.sh
# 添加JAVA_HOME
JAVA_HOME="/usr/java/jdk-11.0.17"
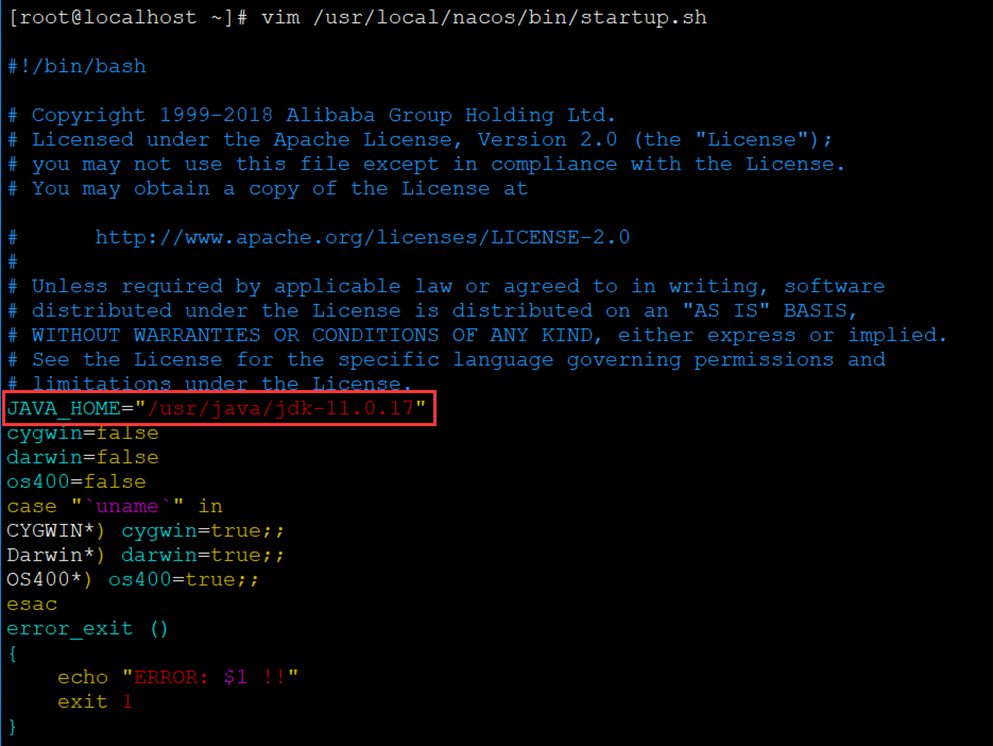
注意:所有Nacos节点需要安装
4)导入Nacos自带SQL文件
1、创建数据库及授权
[root@localhost ~]# mysql -uroot -p
Enter password:
mysql> create database nacos;
Query OK, 1 row affected (0.00 sec)
mysql> grant all on nacos.* to nacos@'%' identified by 'nacos';
Query OK, 0 rows affected, 1 warning (0.00 sec)
mysql> flush privileges;
Query OK, 0 rows affected (0.00 sec)
2、导入SQL文件
[root@localhost ~]# mysql -h192.168.0.200 -unacos -pnacos nacos < /usr/local/nacos/conf/nacos-mysql.sql
5)修改Nacos配置文件,这里采用MySQL,集群模式必须配自己的独立ip
[root@localhost ~]# vim /usr/local/nacos/conf/application.properties
# 192.168.0.197
nacos.inetutils.ip-address=192.168.0.197
spring.datasource.platform=mysql
db.num=1
db.url.0=jdbc:mysql://192.168.0.200:3306/nacos?characterEncoding=utf8&connectTimeout=1000&socketTimeout=3000&autoReconnect=true&useUnicode=true&useSSL=false&serverTimezone=UTC
db.user.0=nacos
db.password.0=nacos
# 192.168.0.198
nacos.inetutils.ip-address=192.168.0.198
spring.datasource.platform=mysql
db.num=1
db.url.0=jdbc:mysql://192.168.0.200:3306/nacos?characterEncoding=utf8&connectTimeout=1000&socketTimeout=3000&autoReconnect=true&useUnicode=true&useSSL=false&serverTimezone=UTC
db.user.0=nacos
db.password.0=nacos
# 192.168.0.199
nacos.inetutils.ip-address=192.168.0.199
spring.datasource.platform=mysql
db.num=1
db.url.0=jdbc:mysql://192.168.0.200:3306/nacos?characterEncoding=utf8&connectTimeout=1000&socketTimeout=3000&autoReconnect=true&useUnicode=true&useSSL=false&serverTimezone=UTC
db.user.0=nacos
db.password.0=nacos
6)配置集群配置文件
[root@localhost ~]# cd /usr/local/nacos/conf
[root@localhost conf]# cp cluster.conf.example cluster.conf
[root@localhost conf]# vim cluster.conf
192.168.0.197:8848
192.168.0.198:8848
192.168.0.199:8848
[root@localhost conf]# scp cluster.conf root@192.168.0.197:/usr/local/nacos/conf/
[root@localhost conf]# scp cluster.conf root@192.168.0.198:/usr/local/nacos/conf/
7)配置系统服务
[root@localhost conf]# vim /usr/lib/systemd/system/nacos.service
[Unit]
Description=nacos
After=network.target

[Service]
Type=forking
ExecStart=/usr/local/nacos/bin/startup.sh -m cluster
ExecReload=/usr/local/nacos/bin/shutdown.sh
ExecStop=/usr/local/nacos/bin/shutdown.sh
PrivateTmp=true

[Install]
WantedBy=multi-user.target
[root@localhost conf]# scp /usr/lib/systemd/system/nacos.service root@192.168.0.197:/usr/lib/systemd/system/nacos.service
[root@localhost conf]# scp /usr/lib/systemd/system/nacos.service root@192.168.0.198:/usr/lib/systemd/system/nacos.service
8)启动Nacos(集群模式,所有节点执行)
[root@localhost conf]# systemctl daemon-reload
[root@localhost conf]# systemctl start nacos
[root@localhost conf]# systemctl enable nacos
9)查看Nacos启动日志
[root@localhost conf]# tail -f /usr/local/nacos/logs/start.out
2023-05-18 10:05:46,305 INFO Nacos is starting...
2023-05-18 10:05:47,311 INFO Nacos is starting...
2023-05-18 10:05:48,316 INFO Nacos is starting...
2023-05-18 10:05:49,318 INFO Nacos is starting...
2023-05-18 10:05:50,326 INFO Nacos is starting...
2023-05-18 10:05:51,328 INFO Nacos is starting...
2023-05-18 10:05:52,334 INFO Nacos is starting...
2023-05-18 10:05:53,339 INFO Nacos is starting...
2023-05-18 10:05:53,647 INFO Nacos started successfully in cluster mode. use external storage
# 出现以上输出代表启动成功
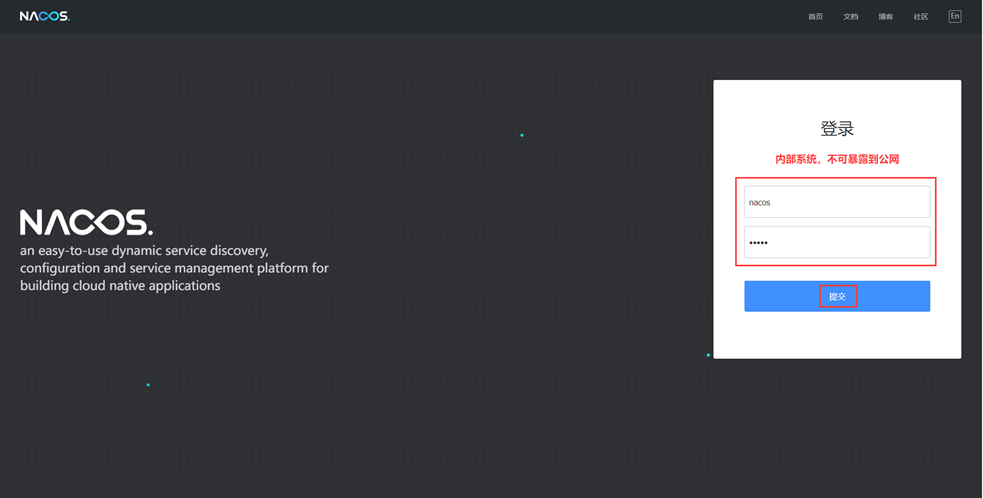
10)访问Nacos
1、浏览器输入访问任意节点,例如http://192.168.0.199:8848/nacos,如下图所示
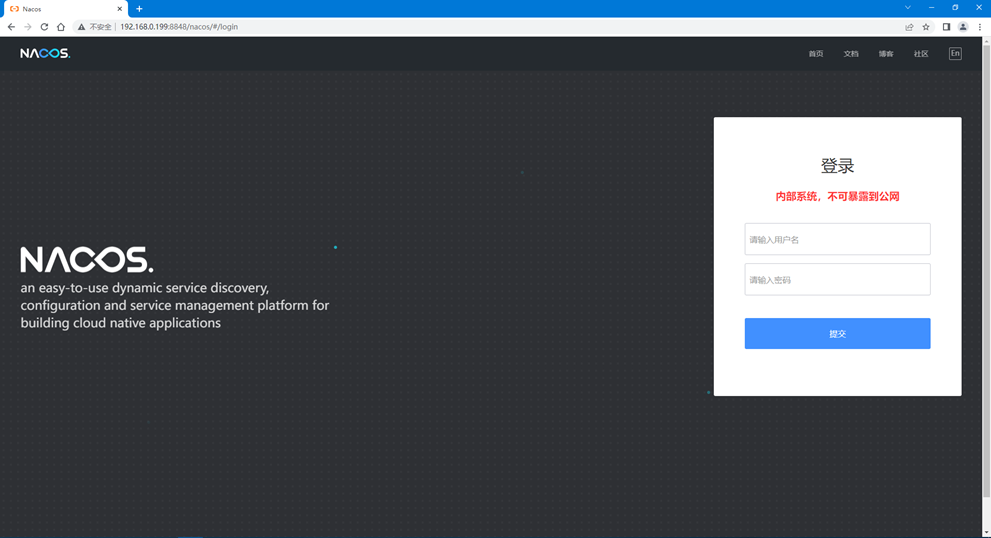
2、登录Nacos(默认账号nacos,密码nacos)
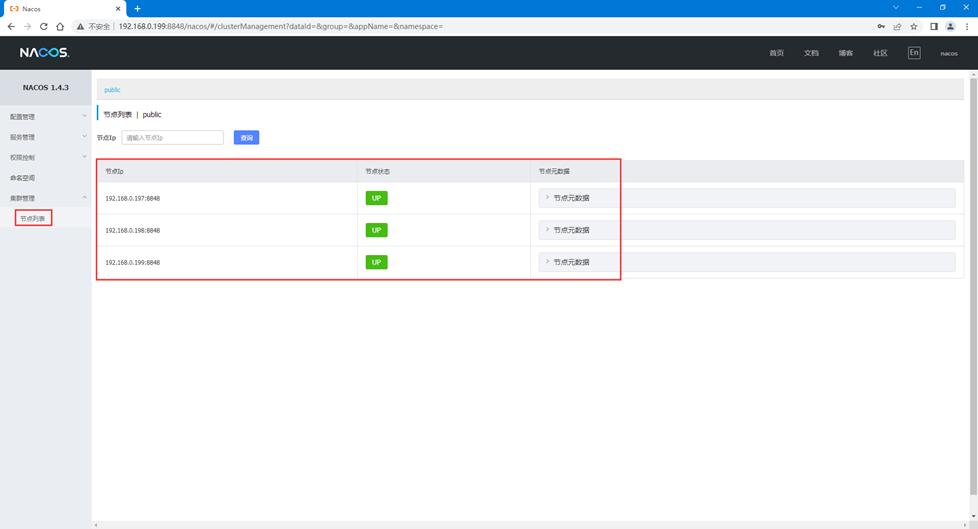
3、查看Nacos集群状态
# 至此安装Nacos集群已经结束了,但是按照官方要求,不要暴露ip到外网,尽量用域名,所以需要安装Nginx。
5、安装Nginx
1)配置Centos 7 Nginx Yum源仓库
[root@localhost ~]# rpm -Uvh http://nginx.org/packages/centos/7/noarch/RPMS/nginx-release-centos-7-0.el7.ngx.noarch.rpm
Retrieving http://nginx.org/packages/centos/7/noarch/RPMS/nginx-release-centos-7-0.el7.ngx.noarch.rpm
warning: /var/tmp/rpm-tmp.PiXlZn: Header V4 RSA/SHA1 Signature, key ID 7bd9bf62: NOKEY
Preparing... ################################# [100%]
Updating / installing...
1:nginx-release-centos-7-0.el7.ngx ################################# [100%]
2)安装Nginx
[root@localhost ~]# yum -y install nginx
3)配置Nginx
[root@localhost ~]# vim /etc/nginx/nginx.conf
    user nginx nginx;
    worker_processes auto;
    pid /var/run/nginx.pid;
events {
    use epoll;
    worker_connections 10240;
    multi_accept on;
    }
http    {
    include       mime.types;
    default_type  application/octet-stream;
    log_format  main  '$remote_addr - $remote_user [$time_local] "$request" '
                      '$status $body_bytes_sent "$http_referer" '
                      '"$http_user_agent" "$http_x_forwarded_for"';
    access_log /var/log/nginx/access.log main;
    error_log /var/log/nginx/error.log warn;
    sendfile        on;
    tcp_nopush          on;
    keepalive_timeout  120;
    tcp_nodelay         on;
    server_tokens off;
    gzip    on;
    gzip_min_length 1k;
    gzip_buffers    4 64k;
    gzip_http_version 1.1;
    gzip_comp_level 4;
    gzip_types      text/plain application/x-javascript text/css application/xml;
    gzip_vary       on;
    client_max_body_size 10m;
    client_body_buffer_size 128k;
    proxy_connect_timeout 90;
    proxy_send_timeout 90;
    proxy_buffer_size 4k;
    proxy_buffers 4 32k;
    proxy_busy_buffers_size 64k;
    large_client_header_buffers 4 4k;
    client_header_buffer_size 4k;
    open_file_cache_valid 30s;
    open_file_cache_min_uses 1;
    include /etc/nginx/conf.d/*.conf;
}
[root@localhost ~]# vim /etc/nginx/conf.d/nacos.conf
upstream cluster {
    server 192.168.0.197:8848 max_fails=3 fail_timeout=15;
    server 192.168.0.198:8848 max_fails=3 fail_timeout=15;
    server 192.168.0.199:8848 max_fails=3 fail_timeout=15;
}
server {
    listen 80;
    server_name localhost;
    location / {
        proxy_connect_timeout    60;  # nginx跟后端服务器连接超时时间(代理连接超时)默认60s
        proxy_read_timeout       60;  # 后端服务器数据回传时间(代理发送超时)默认值60s
        proxy_send_timeout       60;
        proxy_pass http://cluster;
    }
}
# https正式配置
upstream cluster {
    server 192.168.0.197:8848 max_fails=3 fail_timeout=15;
    server 192.168.0.198:8848 max_fails=3 fail_timeout=15;
    server 192.168.0.199:8848 max_fails=3 fail_timeout=15;
}
server {
    listen 443 ssl;
    server_name 域名;
    # SSL证书文件
    ssl_certificate xxxxxx.pem;
    # SSL证书私钥文件
    ssl_certificate_key xxxxxxx.key;
    # 使用的协议版本
    ssl_protocols TLSv1 TLSv1.1 TLSv1.2;
    ssl_session_cache shared:SSL:1m;
    # SSL会话超时时间
    ssl_session_timeout  5m;
    # 配置加密套件,密码加密方式
    ssl_ciphers ECDHE-RSA-AES128-GCM-SHA256:HIGH:!aNULL:!MD5:!RC4:!DHE;
    # 依赖SSLv3和TLSv1协议的服务器密码将优先于客户端密码
    ssl_prefer_server_ciphers  on;
    location / {
        proxy_connect_timeout 60;  # nginx跟后端服务器连接超时时间(代理连接超时)默认60s
        proxy_read_timeout 60;  # 后端服务器数据回传时间(代理发送超时)默认值60s
        proxy_send_timeout 60;
        proxy_pass http://cluster;
    }
}
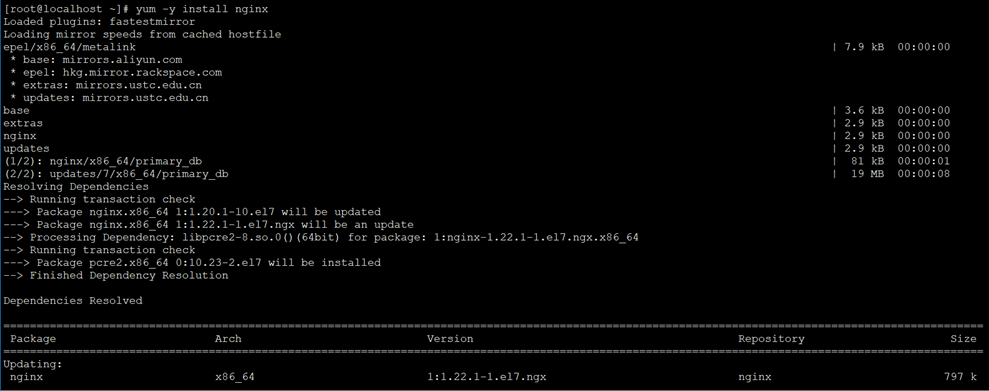
4)启动Nginx
[root@localhost ~]# nginx -t
nginx: the configuration file /etc/nginx/nginx.conf syntax is ok
nginx: configuration file /etc/nginx/nginx.conf test is successful
[root@localhost ~]# systemctl start nginx
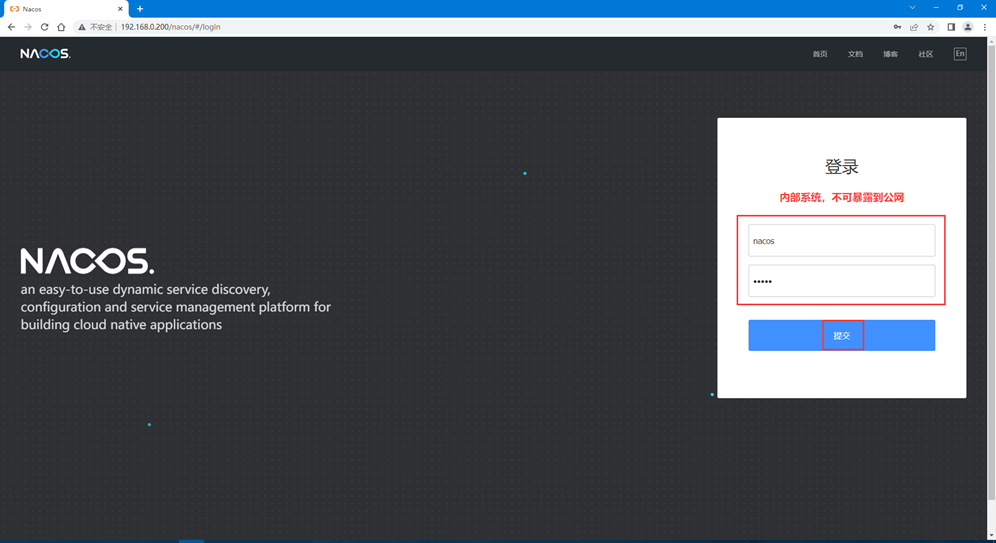
5)访问Nacos
1、浏览器输入http://192.168.0.200/nacos,如下图所示
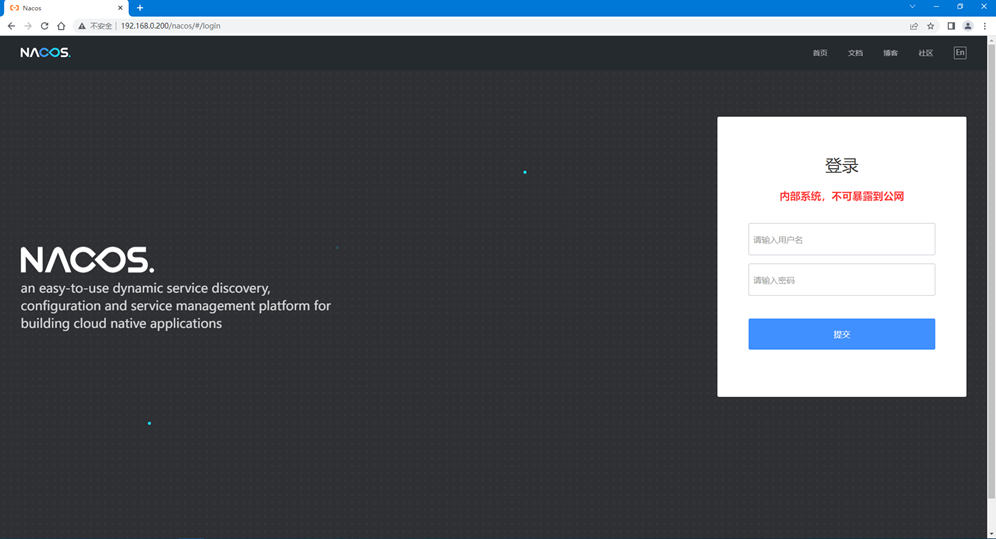
2、登录Nacos
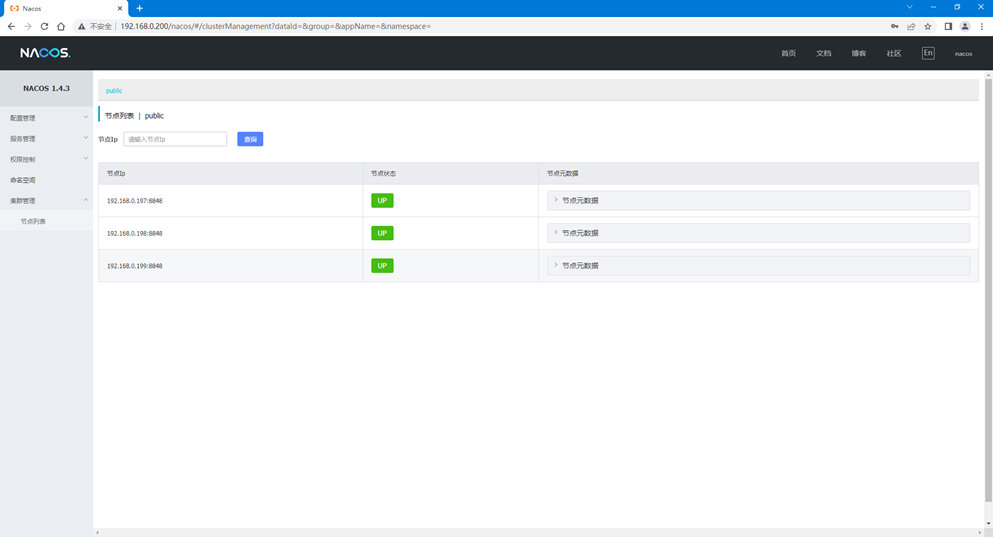
3、查看Nacos集群状态
4、服务注册、服务发现和配置管理
1)服务注册
[root@localhost ~]# curl -X PUT 'http://192.168.0.200/nacos/v1/ns/instance?serviceName=nacos.naming.serviceName&ip=20.18.7.10&port=8080'
2)服务发现
[root@localhost ~]# curl -s -X GET 'http://192.168.0.200/nacos/v1/ns/instance/list?serviceName=nacos.naming.serviceName' | python -m json.tool
{
"cacheMillis": 3000,
"clusters": "",
"hosts": [],
"name": "DEFAULT_GROUP@@nacos.naming.serviceName"
}
3)发布配置
[root@localhost ~]# curl -X POST "http://192.168.0.200/nacos/v1/cs/configs?dataId=nacos.cfg.dataId&group=test&content=helloWorld"
4)获取配置
[root@localhost ~]# curl -X GET "http://192.168.0.200/nacos/v1/cs/configs?dataId=nacos.cfg.dataId&group=test"
若文章图片、下载链接等信息出错,请在评论区留言反馈,博主将第一时间更新!如本文“对您有用”,欢迎随意打赏,谢谢!


评论